FOUNDRY VTT
Guide
This guide will show you step by step how to import the modular map elements and ready to play maps into Foundry VTT.
Before you start.
Unfamililiar with Foundry VTT in general?
Take a look at these links to get to know the basics:
How to
import modulaR map elements
in 4 easy steps:
Turn your phone around for a better overview!
- Log in as GM to the world where you want to use the modules in.
If you don´t have a world yet simply create one >Main Menu >Create World
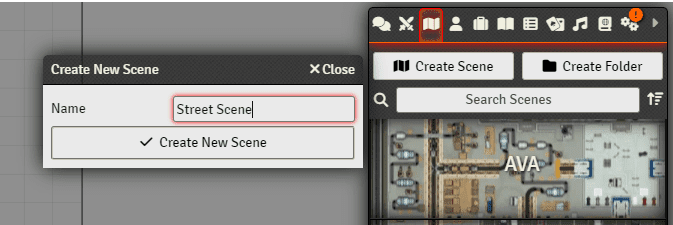
Create a new scene where you want to create your map in.
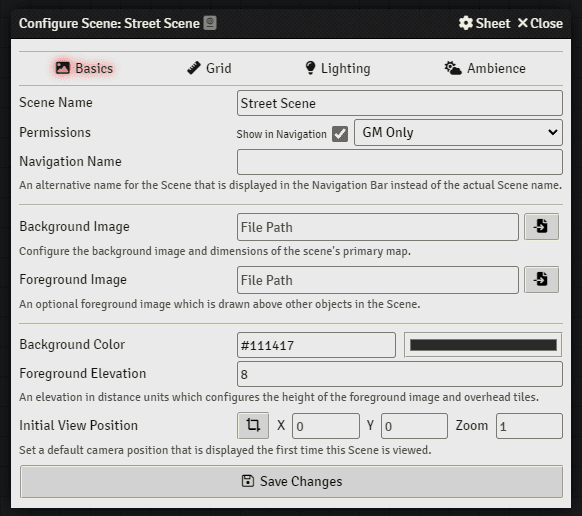
Configure you Scene
Depending on the modules you want to use set the Grid Size to 100 (for 100ppi modules) or 300 (for 300ppi modules)
- You don´t need a Foreground / Background Image as we import the modules as Tiles
Tip 1: Name your scenes immidiately – before you lose oversight.
Tip 2: Personally I like to have a darker board colour so I changed the Background colour to a dark grey (#111417).
Tip 3: I set the grid size to 40×40 (4000 x 4000 as I use 100ppi Modules) so that I have enough space to place my modules. You can make it smaller or bigger afterwards.
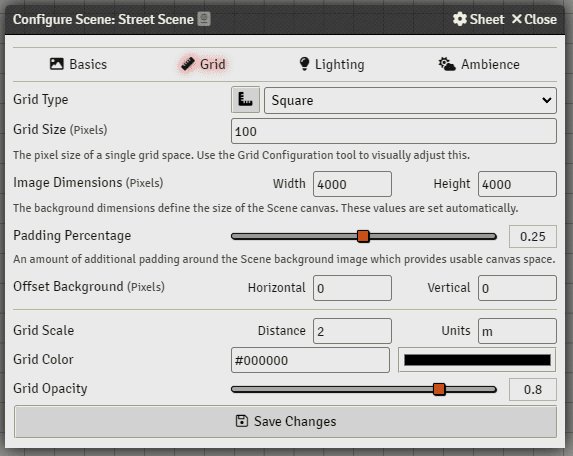
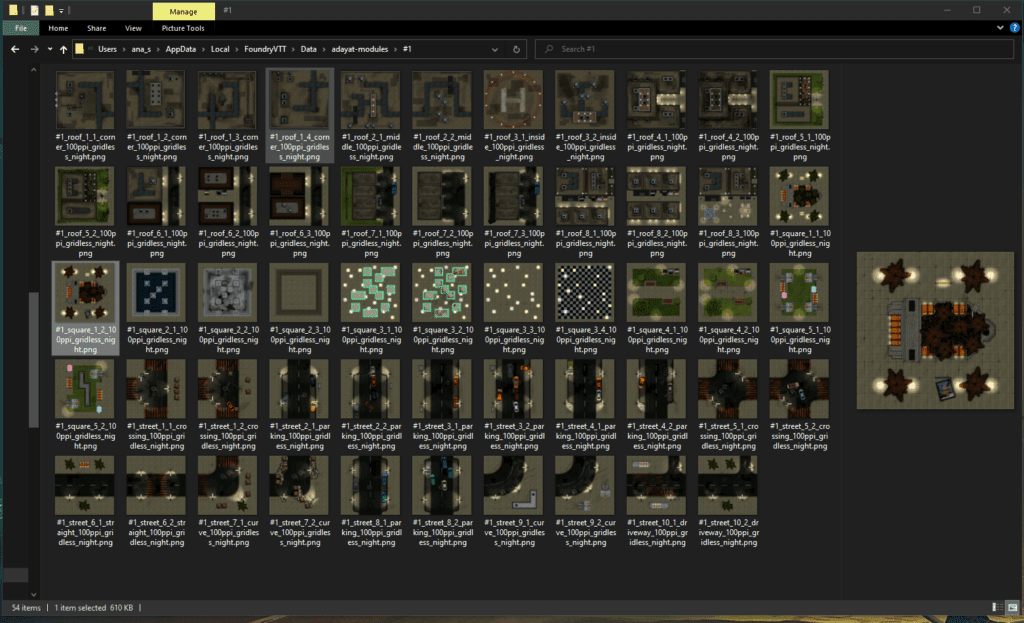
- I Upload the modules in the Foundry VTT Data Folder:
- C:\Users\your-username\AppData\Local\FoundryVTT\Data\foldername
- Access the Modules in the Tile Browser >left sided menu > Tile Controls > Tile Browser (see Image below)
-
Make sure to set the Asset Grid Size to your pixel size you used in the scene
Tip 1: I named my folder “adayat-modules” and sorted the modules by content pack number (“#1”, “#2”, …) for a better overview.
Tip 2: I plan to integrate my content on the Forge Bazaar – stay tuned for more info.
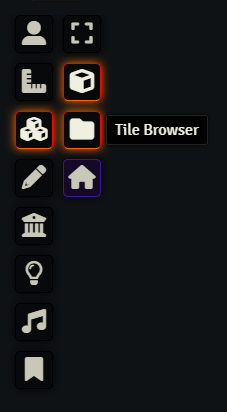
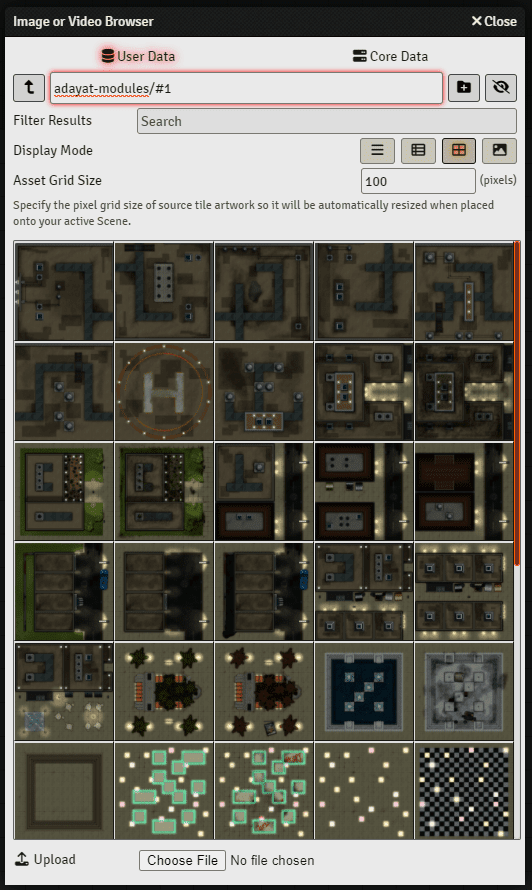
- Now you can simply drag & drop the modules you want to use from the Tile Browser into your scene
Arrange the modules as you want them to be
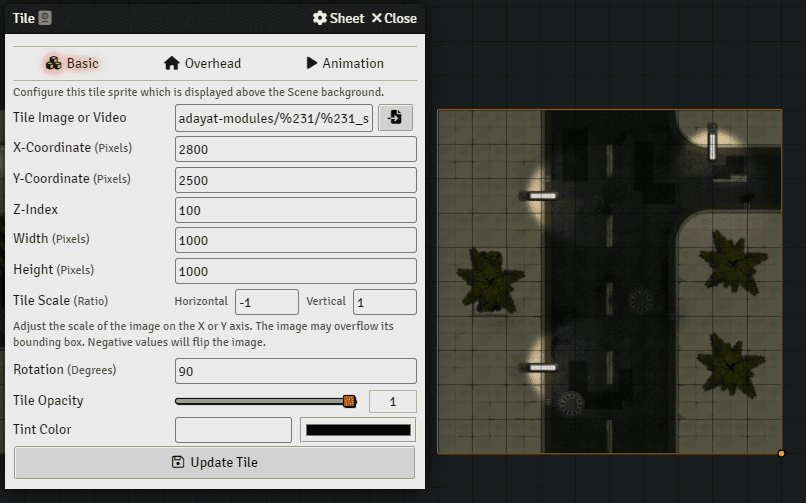
Tip 1: You can rotate or flip the modules with > double click > change Tile Scale to mirror > change rotation to rotate (see image below)
Tip 2: You can change the Display Mode in the Tile Browser if you want to see an image preview of the modules
Tip 3: The modules should have the right size, otherwise check your scene settings and Asset Grid Size > In an case of necessity, you can also change the size by dragging and pressing the orange dot in the lower right corner or by changing the width / height in the Tile Options (Double click on the Tile).
Change the size in the scene settings to the size you actually used
Arrange your modules in the upper left corner of the map
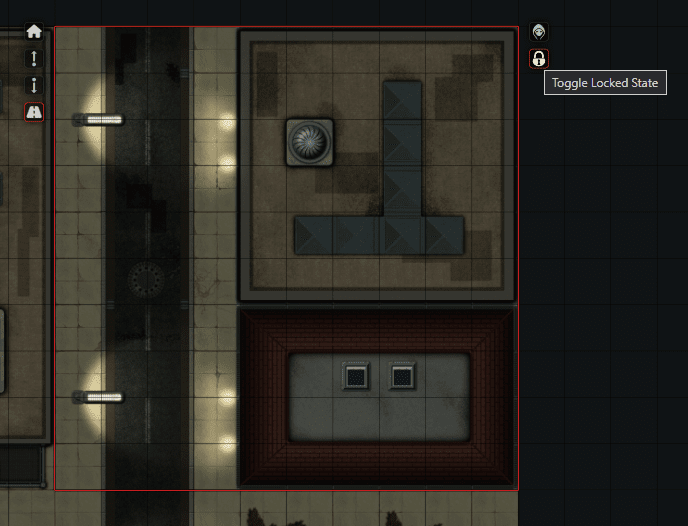
Lock the Tiles [so you don´t accidentally rearrange them in game] > right click > click Lock symbol (Toggle Locked State)
Now you are ready to go!
> Or you can start set up walls and lighting for your map.
Tip 1: To see the dimensions of your map you can draw a rectangle around your map > Double click on the rectangle > use the shown width and height in the scene settings
Tip 2: You can select all tiles at once by using > Tile Controls > Select Tiles > draw the selection around the complete map > Rearrange and/or Lock all tiles at the same time
