How to
activate custom assets
Turn your phone around for a better overview!
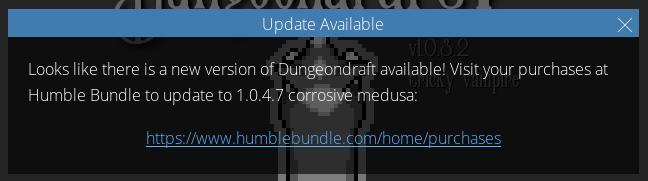
Make sure you have the latest version of dungeondraft installed.
You can see which version is currently installed at the top right of the screen
> If it says “update to date” you are good to go
> Otherwise you can click on it and download the latest version from your HumbleBundle Account.
- Create a new folder where you want to store your custom assets
- You can name the folder as you please and the location of the folder does not really matter
Tip 1: Some say that you shouldn´t put the folder in your program files – as this could lead to problems in the readability of the files.
Tip 2: If you want to install a few more custom assets, make sure to install them on a hard drive hat still has enough space available.
Tip 3: Don´t bury it too deep on your computer – so you don´t max out the windows path length limitation of 256 characters.
_
Example:
I created a folder named “customs_Assets” in my Battlemaps folder – so everything stays neat at the same place.

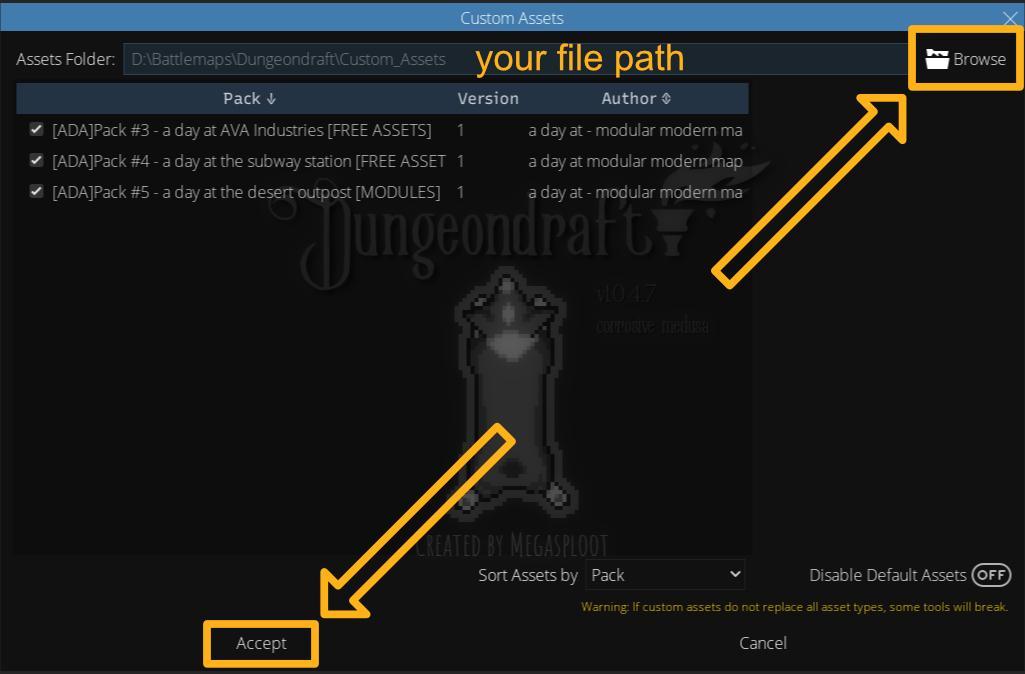
- Open the custom Assets overlay > “Assets” Tab on the menu
- Browse to the location of your folder
- Press accept to save the settings

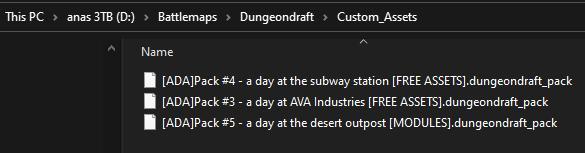
- Upload the “.dungeondraft_pack” files in your folder
Tip: If you don´t have any custom dungeondraft asset packs yet feel free to browse my free content to try some out.
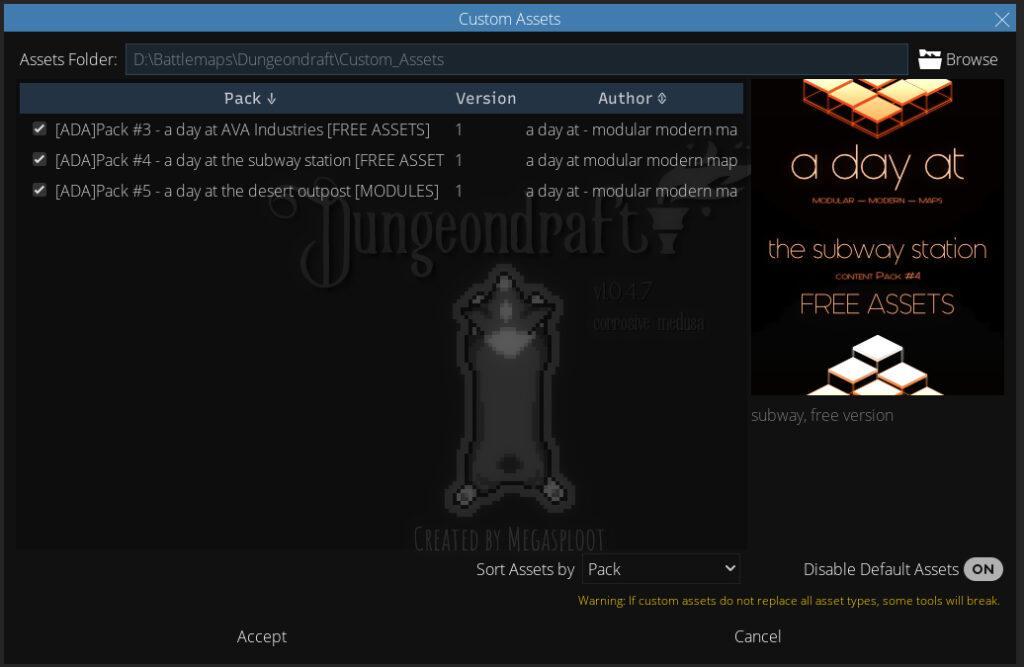
- Re-open the custom Asset Overlay
- Check the asset packs you want to activate
- Press accept to save the settings
- Start a new map – all chosen asset packs should be activated, you can check it by clicking on the “Edit Asset Pack Selection” Button
Tip: If you upload many custom assets at once it can take a while and possibly lead to crashes. If this is the case, deactivate the packs that you do not urgently need.
How to
use custom assets
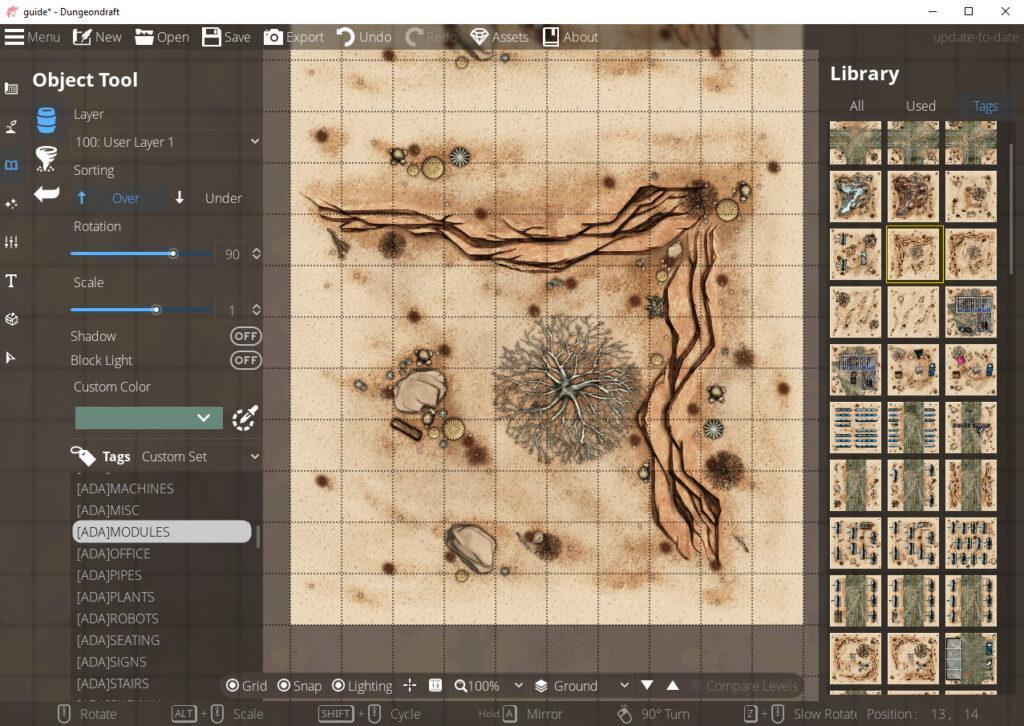
some tips and tricks:
Most creators use the tag menu to label their content
> The a day at content is marked with [ADA]
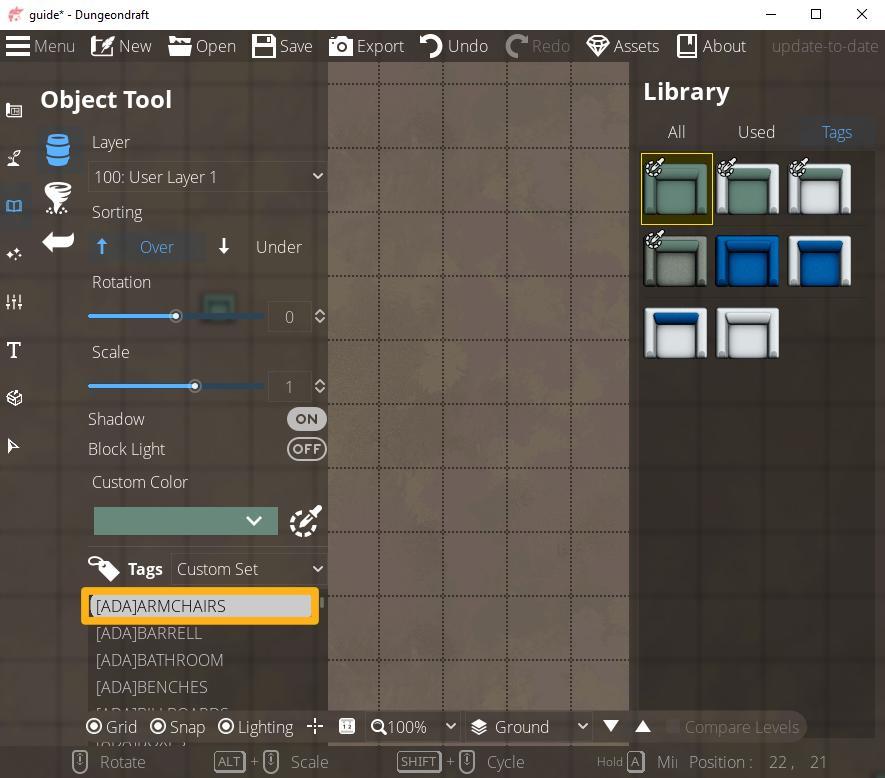
All modules are automatically integrated in the correct size
– to ensure that: set the scale to 1
Also helpful:
- Activate “snap” to snap the image to the grid
- Deactivate the shadow
Since there are already many great people who can do much better tutorials –
I just link to some helpful content and creators here:
